BBQ tips and techniques
Scan for article:
bkyhd.com/brisket-trim
Support us:
bkyhd.com/patreon
Learn the methodical, easy to remember brisket trim method. Focus on one side at a time - fat side first, then meat side.
Watch the Tutorial
Related Videos
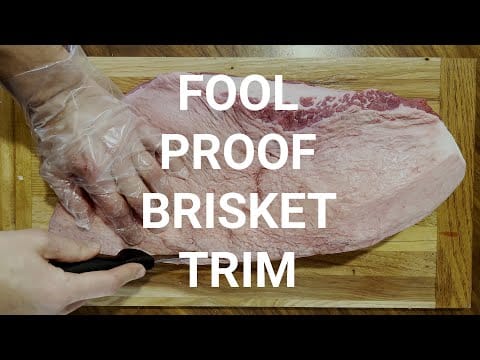
Come learn how to trim a brisket in the easiest way possible. Step by step instructions here: https://backyahdbbq.com/foolproof-brisket-trim/ - includes more details and before and after photos for e...
No videos found for "brisket trim"
Today I'm going to show you my favorite brisket trimming method - what I call the "Foolproof Brisket Trim". I like this method because it is methodical, easy to learn, and easy to remember. Most of the videos and blogs out there have you flip the brisket around many times, and you lose track of things quickly. With this method, we learn the brisket parts and then focus on trimming one side at a time, starting with the fat side and then flipping it over to focus on the meat side.
Once you learn this method, you'll never forget it and will get more efficient with it every time you trim a brisket. You'll likely be able to do a whole trim in 5 minutes and could probably even do it blindfolded.
Please remember to save all your trimmings. Render the fat down into tallow and use the meat in burgers, stir-frys, or anything else you can think of.
Finished Foolproof Brisket Trim Method
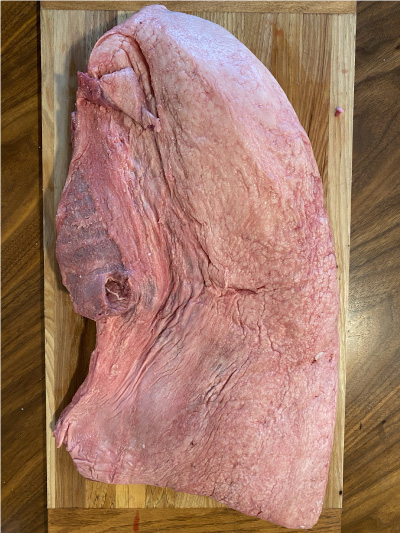
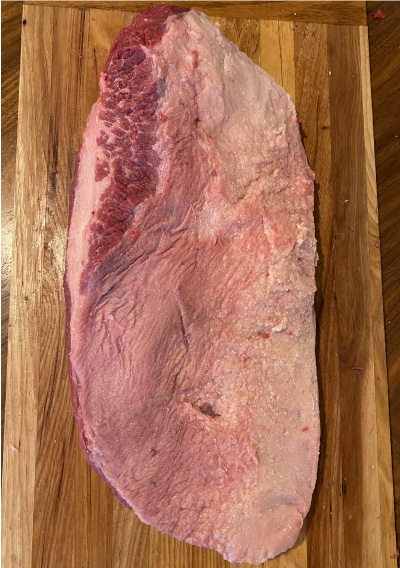
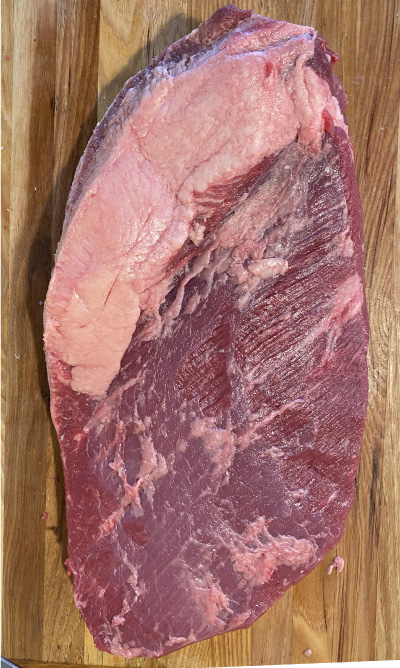
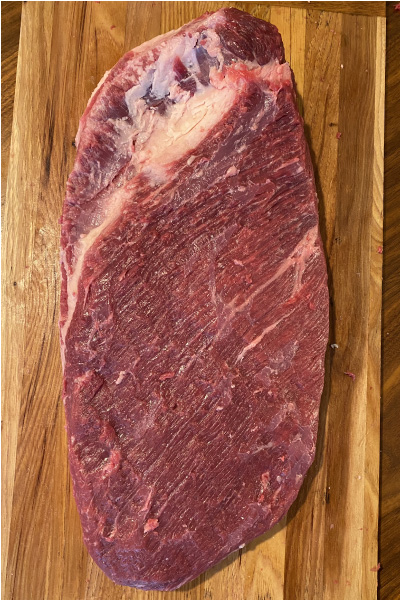
Here's a sneak-peek at what the finished trim looks like on each side:
Fat side before and after finished trim
Before
After
Meat side before and after finished trim
Before
After
Brisket Parts
First let's start by learning the brisket parts.
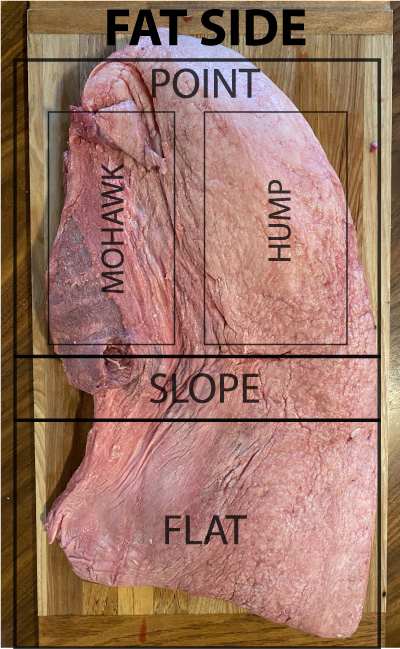
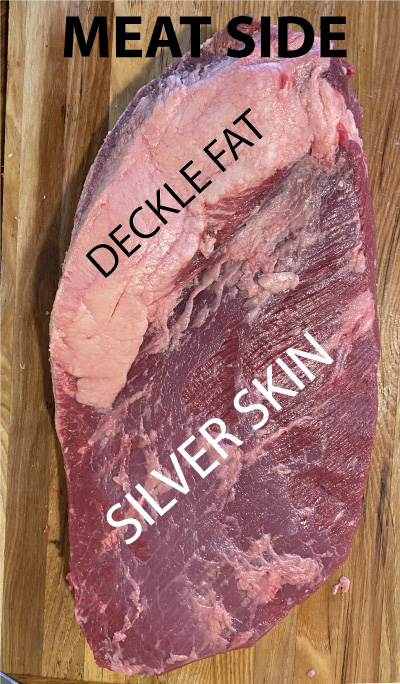
Sides - fat side and meat side
A brisket has two sides. The fat side and the meat side. They are easy to find because the fat side is covered in fat and the meat side isn't.
Ends - the point and the flat
A brisket has two ends. The point and the flat. The point is thicker than the flat. The point is also known as "moist end" and the flat is also known as the "lean end". They are actually two muscles that overlap each other with a band of fat between them, called the deckle fat.
Slope
This is the part of the brisket on the fat that is between the point and the flat. We call it out because there's usually a large deposit of fat here that should be removed. We call it the slope because it is the part that slopes from the thick point to the thin flat.
Mohawk
This is the flap of meat and fat that is on the point end. It looks like a mohawk when you hold it up.
Hump
This is the fat hump on the point that is across from the mohawk. It is the thick fat on the point.
Deckle fat
This is the thick and very white fat between the point and the flat muscles. You will find deckle fat on both the fat and the meat sides.
Silver skin
We have some small sliver of fat and layers of silver skin on the meat side.
Trimming Method
Now let's dig into the trimming method.
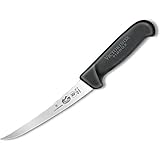
I like to use a 6" curved semi-stiff boning knife from Victorinox.
Fat side
We'll start with the fat side. I like to do the fat side first because the fat is easier to cut when it is cold.
Begin each step by flattening out the entire brisket so it is as long and wide as it can be on the board. That way you have an accurate picture of what to cut. If you don't flatten it out, then you'll need to make a lot more cuts.
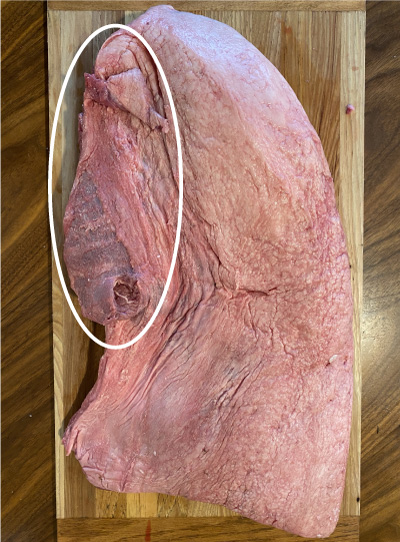
Step 1: Mohawk
Slice the mohawk off and round off the point so it has a natural curve around towards the meat side. Some people don't slice off the entire mohawk, but I like to because it will overlap other parts of the brisket, rub will get in between and be soft, and bark won't develop there.
Before
After
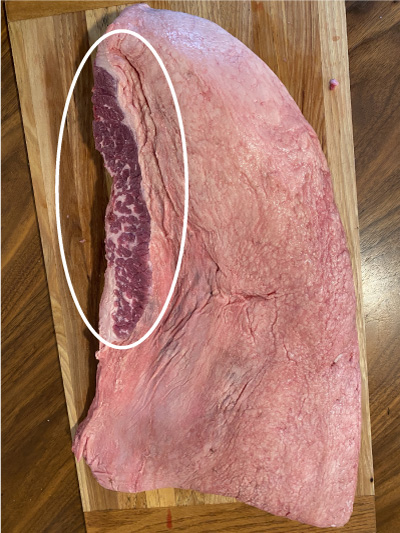
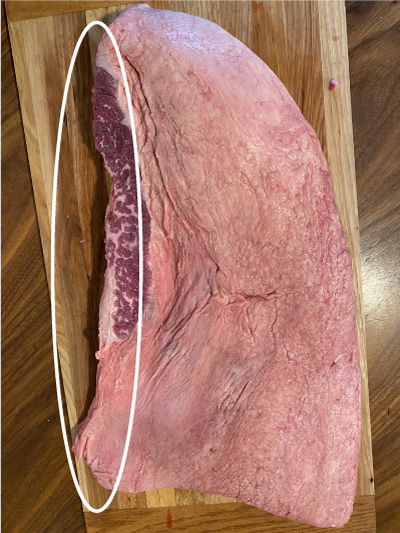
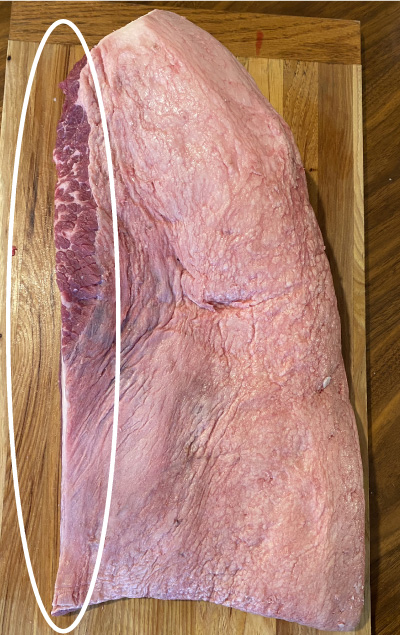
Step 2: Mohawk long edge
Cut off the mohawk long edge to remove any browned meat and to expose the meat and fat along the flat.
Before
After
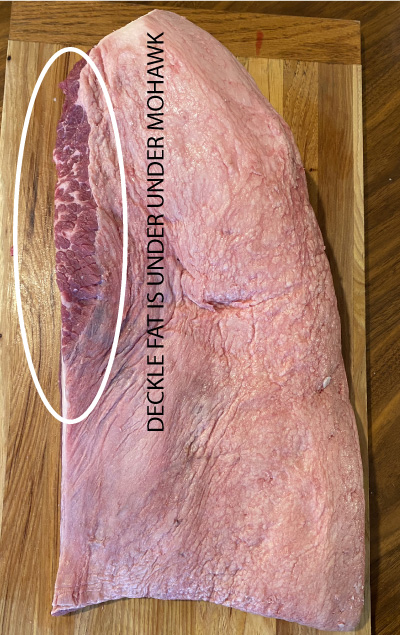
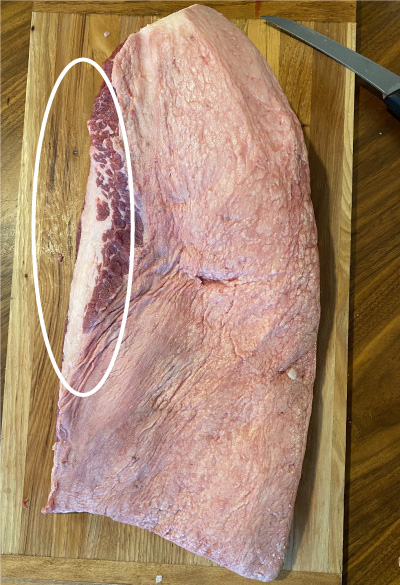
Step 3: Mohawk deckle
Slice the deckle fat under the mohawk at a 45-degree angle leaving 1/4" of fat at bottom. This might be hard to see from this angle, but focus on the left side of the brisket, under the mohawk and slice the deckle out at an angle, but don't remove too much of it.
Before
After
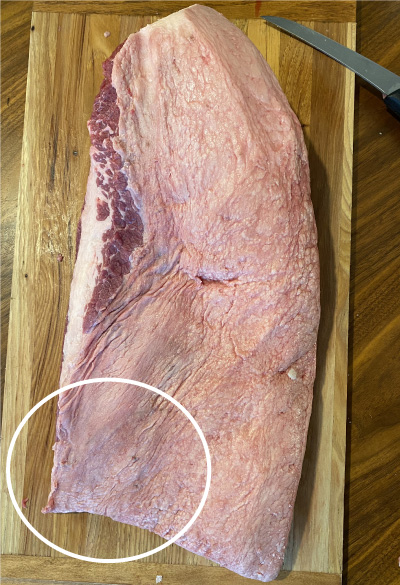
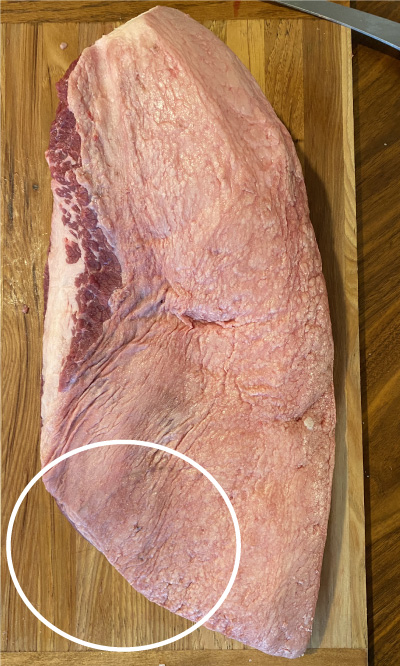
Step 4: Mohawk side flat corner
Cut a 45-degree angle of the left side of the flat so that the meat is at least 1" thick and round off the edges.
Before
After
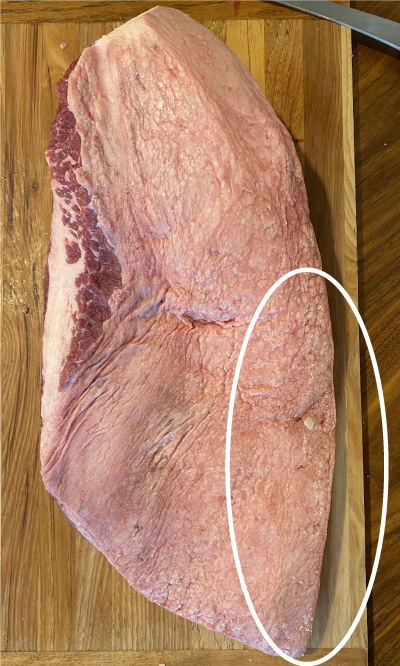
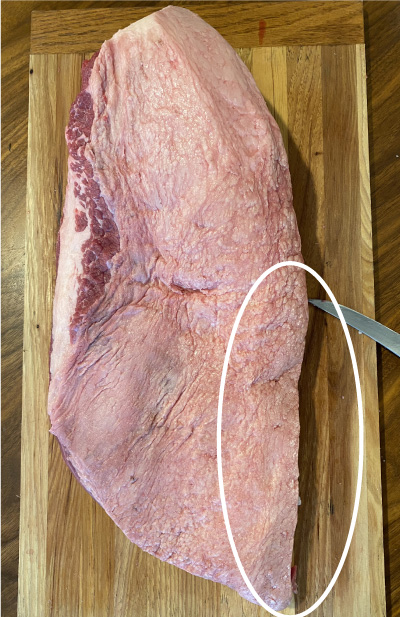
Step 5: Hump long edge
Cut off the hump long edge to remove browned meat and you can see the fat to meat ratio.
Before
After
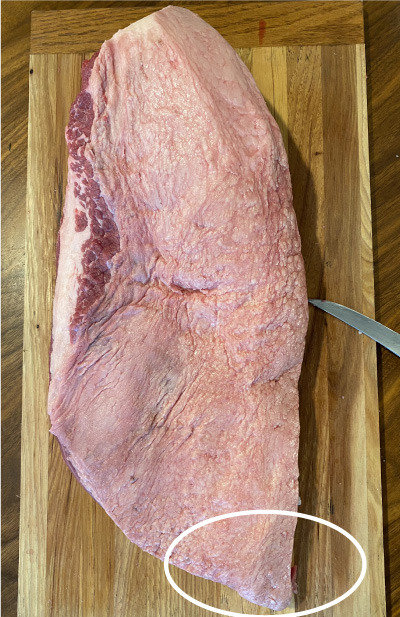
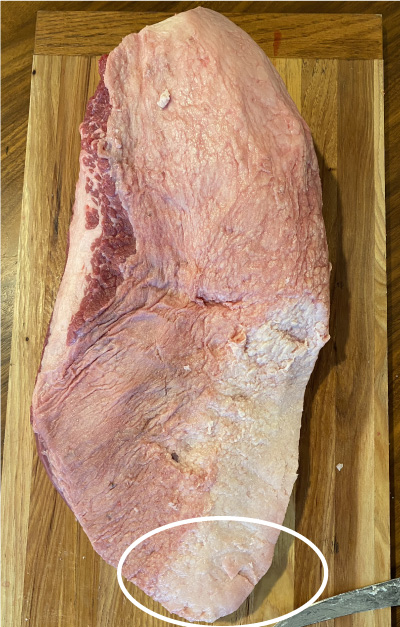
Step 6: Hump side flat corner
Round off the right-side flat corner.
Before
After
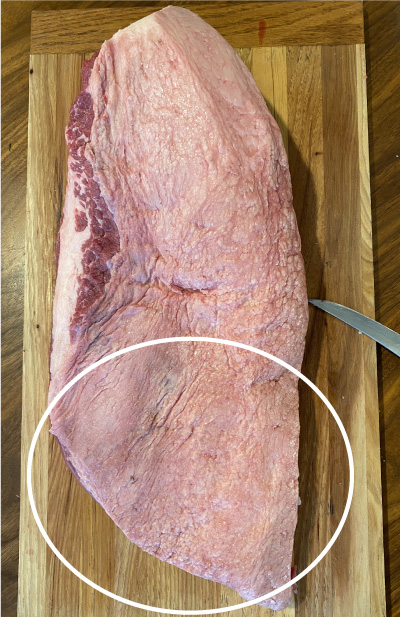
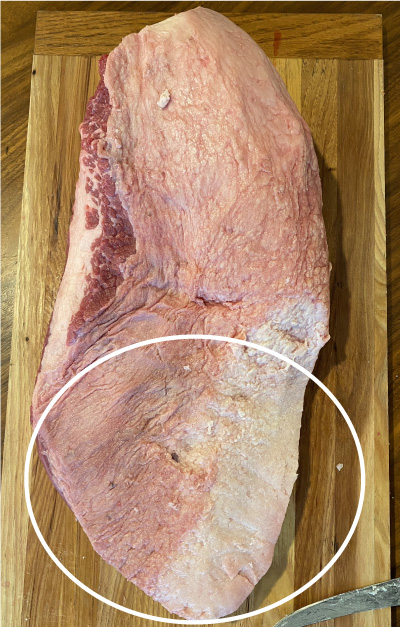
Step 7: Flat fat
Trim the fat above the flat so it is 1/4" all the way around. Be careful not to cut into the meat. But if you do, back the knife out, and move on. Don't labor on it and don't keep cutting through the meat. Keep in mind that even Aaron Franklin makes mistakes sometimes, so you likely will as well.
Before
After
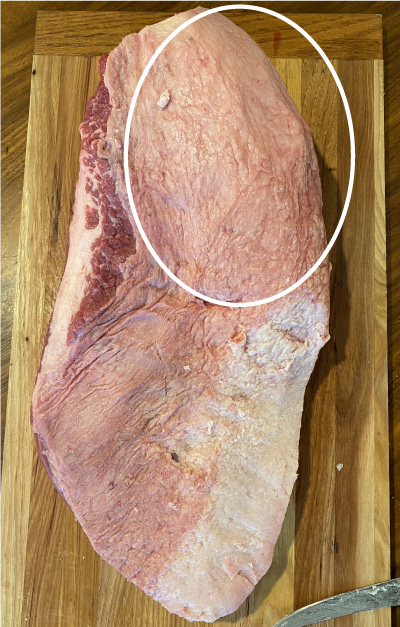
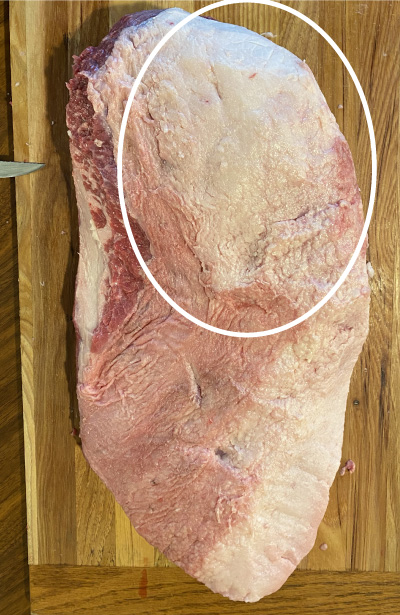
Step 8: Hump fat
Trim the hump fat so it is 1/4" thick all the way around. Cut in a motion from the middle of the brisket towards the hump edge.
You'll want to feel for any sections that feel harder than the rest and slowly and carefully trim away at it taking out small layers at a time.
To know how firm the fat should feel, find a place where we have 1/4" fat and then trim until the entire fat layer feels the same way.
Before
After
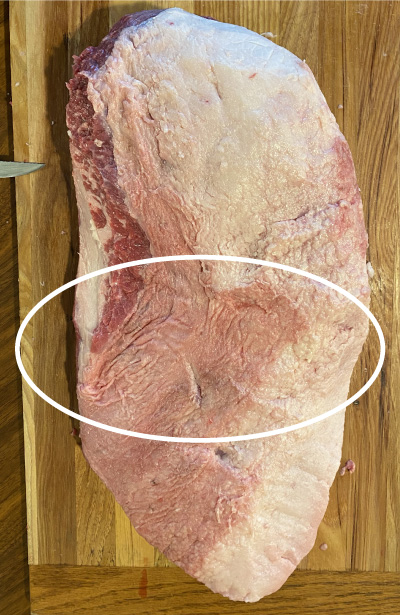
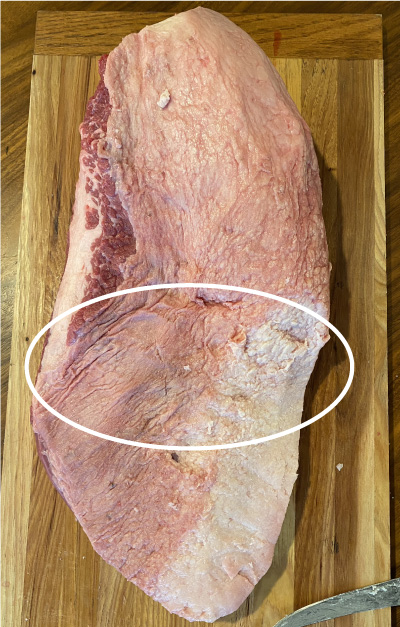
Step 9: Slope fat
Trim the fat on the fat side that is between the point and the flat down to 1/4". It's the part where the point slopes down into the flat.
Most of the time you'll see a lot of fat build up there.
Before
After
Meat side
Now let's flip it over and trim the meat side.
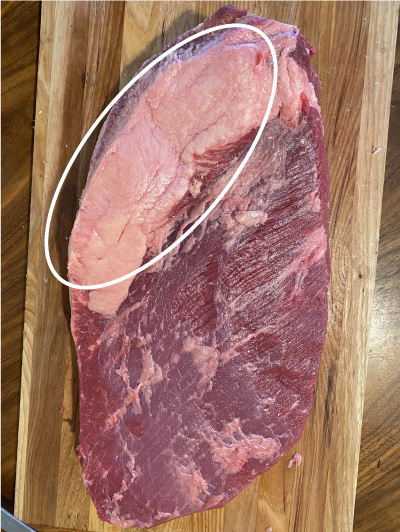
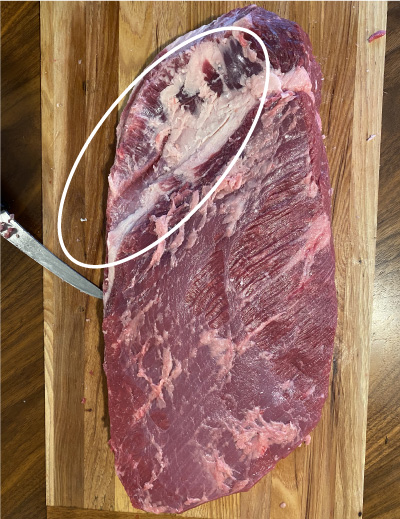
Step 10: Deckle fat
Under the point there's a large chunk of deckle fat. You can either shave or scoop it out. To shave it cut it at a 45-degree angle. To scoop it out cut along the line where the fat and meat meet and scrape your knife along that natural line.
A lot of people just slide it off and a lot of people scoop it out. You should try both methods and see which one you like better.
Before
After (Scoop Method)
Step 11: Fat and silver skin
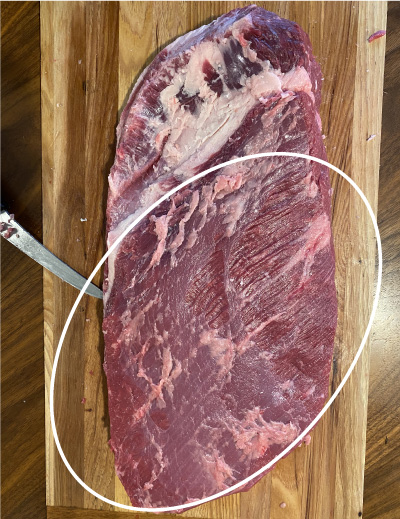
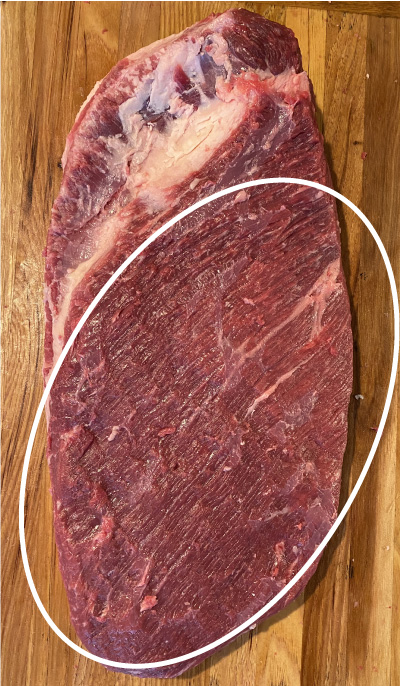
Carefully slice off any silver skin or fat you find on the meat side. Slice with the grain. You don't need to remove it all. Focus on the thicker parts first. Try to be as consistent as possible.
Before
After
Conclusion
I hope you find this foolproof brisket trim method helpful. Let me know in the comments how you trim a brisket and if this helped you.
Ready to cook your brisket?
Check out our comprehensive brisket smoking guide for step-by-step instructions.
Jonny
Essential Gear